
What I do to layout the stippling design and frame mods before I start working on my build.
I use a pencil to draw out a rough outline, on this black frame I used a silver white show it shows up.

The Freedom Wolf has a lot of curves in the original design so I thought for this build I would keep that them going throughout the build.

My plan is to bring the stippled grip lower on the frame, so I have more room to combine the upper slide paint down into the frame for a complete color pattern. I all so plan on doing the index finger cut into the trigger. You really have to try this type of cut out, for my hand this feels so good, it is a custom fit made just for my shooting hand.
This will have a two-tone type stippling with one having the look of old leather armor, you could also call it something like dragon scale. I had to make my own stippling tip for this look. The second stipple will be a fine random type that I use a lot when I want more of a subtle look.
So now after getting a plan to start with I get started with the roughout part for stippling.

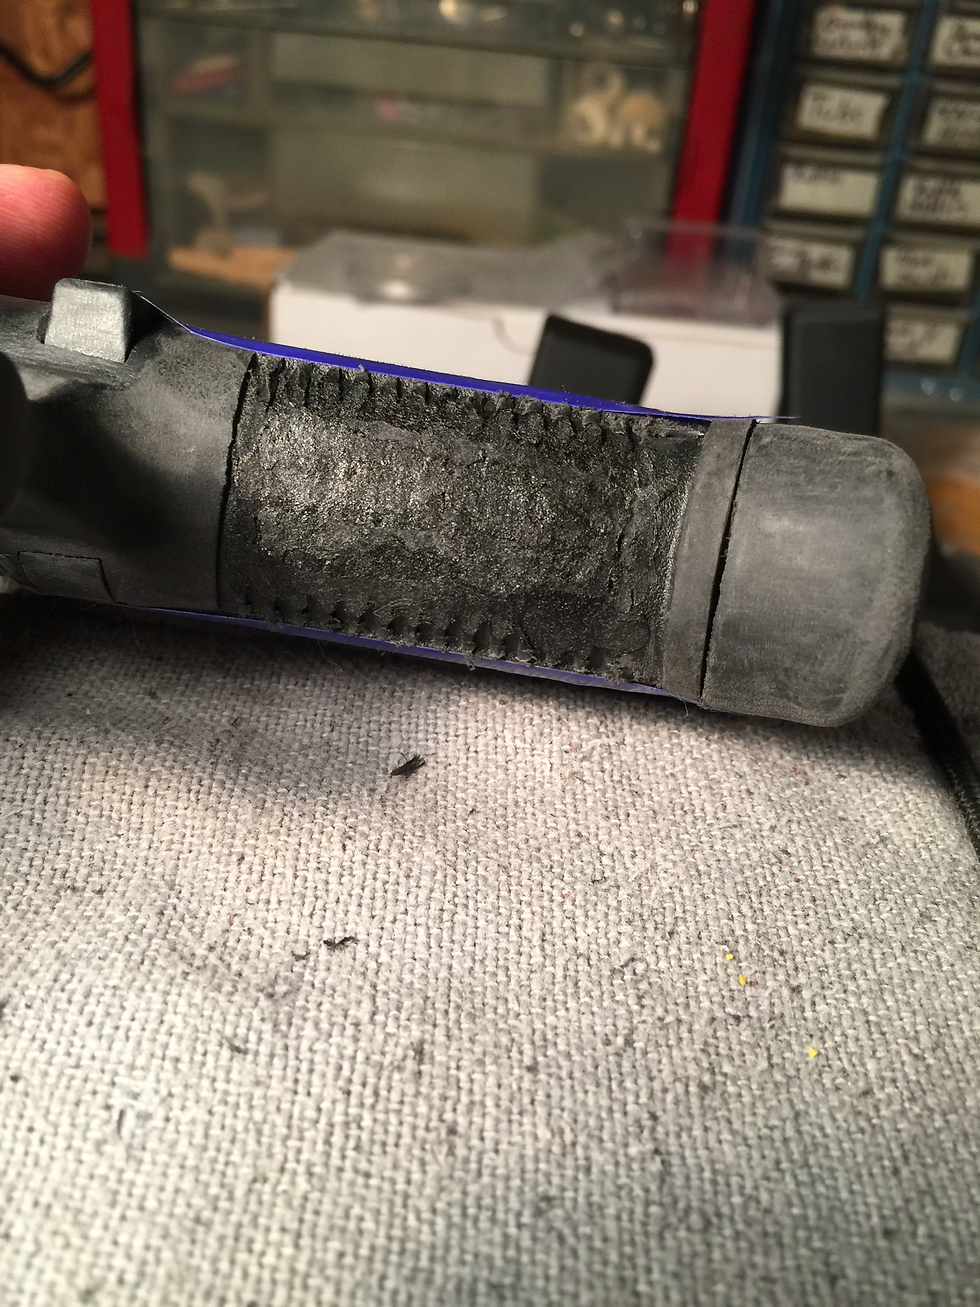
You can see I started my layout by doing a roughout for the index finger and started a line for where the boarders will be. You can see I also sanded off that hump next to the back side of the magazine release. I know this is for a left-hand shooter I am not left-handed so this being a custom hand fit for my right hand I see no reason to keep it.
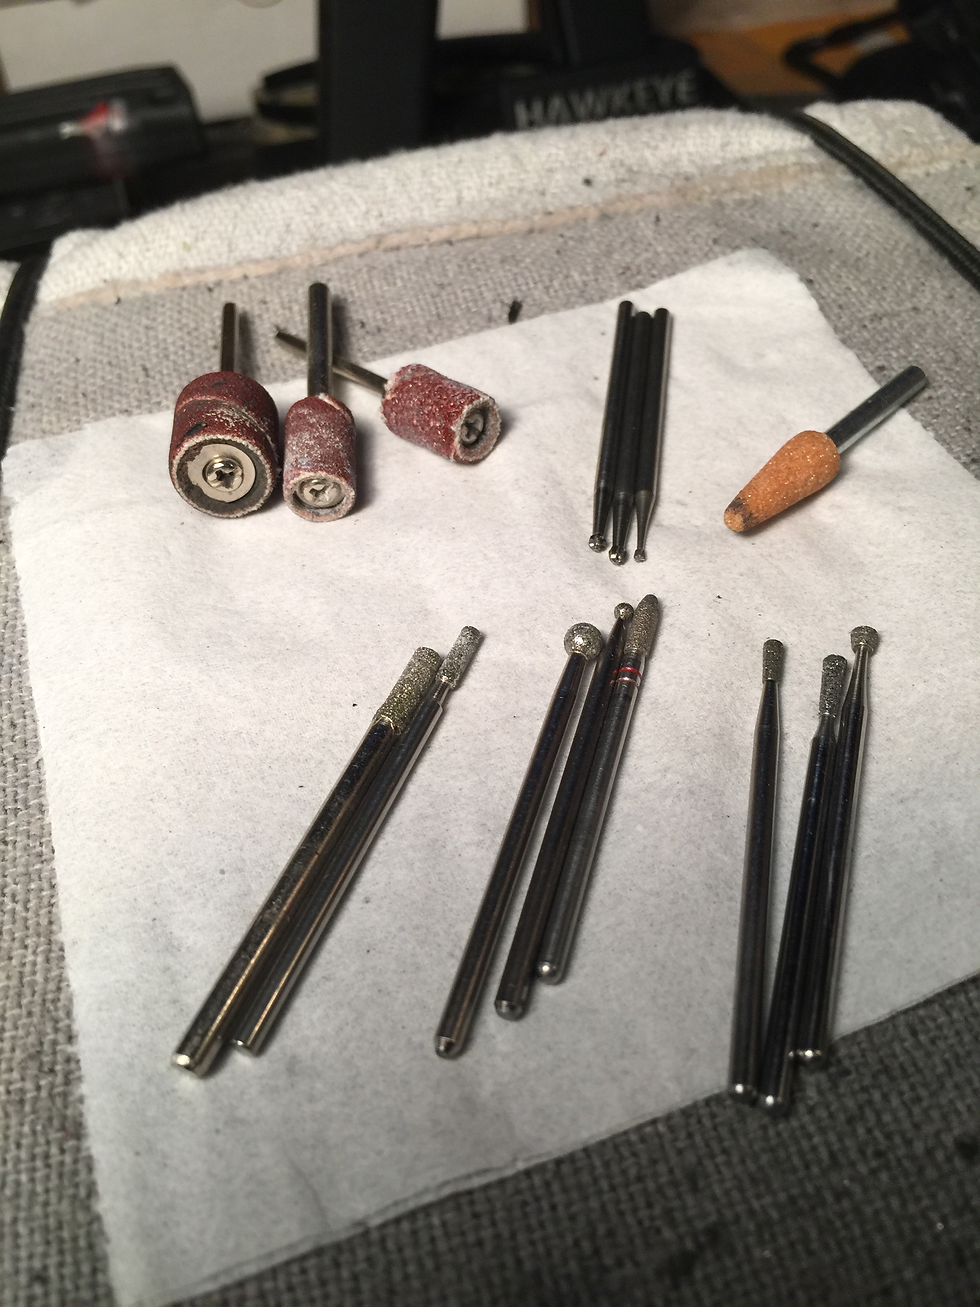
Here is what I like to use for layout, I find them easy to control and by controlling the speed I can remove more stock or just a slow cleanup. I posted more info on tools in the "resources"
After making small layout guideline I start to bevel back into the stippling area. The reason you want to have this bevel is to give the stippling a flush look as well as an inserted look like pistols that have inserted grips. It is just a little extra that adds a more custom look to your stippling work.
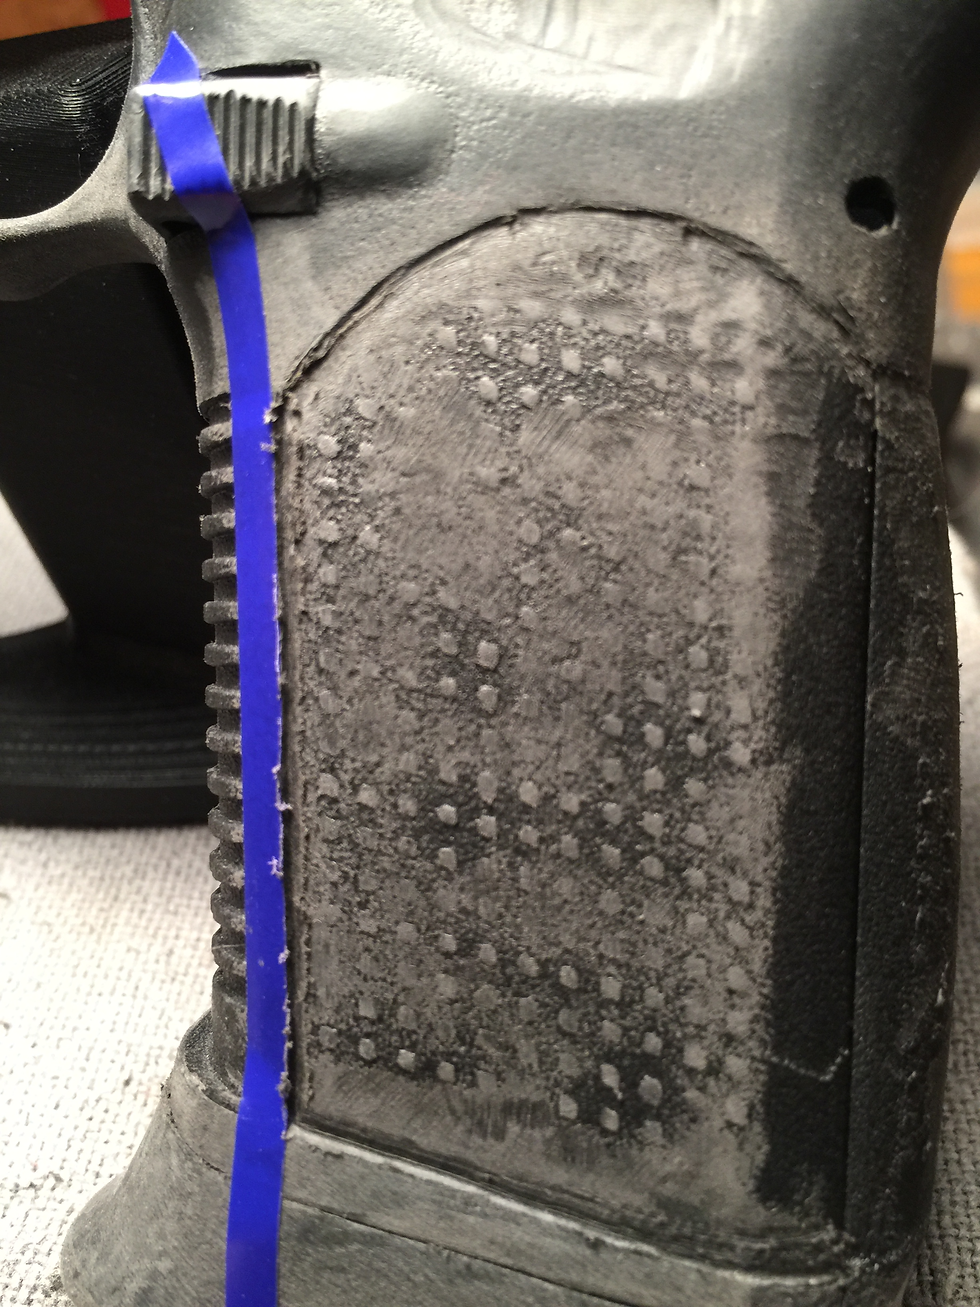

Here is a trick I like to use for layouts in straight lines, by using tape I have a stright line to go by for hand cutting boarders. This gives me a straight line on both sides to help guide your free hand cuts. Doing a radius cuts I use a set of radius gages to draw them out but then free hand cut. I like to use a small bevel diamond burr or a small round ball diamond burr to do these cuts to start off and change to a bigger beveled diamond burr. I prefer these diamond burr instead of the carbide burrs for the reason diamond burs cut slower and when cutting you first pass you don't get gouging like you get from carbide burrs.

My plan for the stippling will need a flat surface on the sides and rear part of the grip so I have to fill in the wolf logo, so by melting some tabs I saved will keep my stippling from having a dip where this is at on the grip, after all why would you want to have this logo in the middle of your custom stippling job it looks awful.
The front of the grip has an aggressive texture cut in it, on my first LW build I sanded it off but on this build, I used a round flat end stippling tip to melt the cuts out smooth. This is something that you should learn and be conferrable in doing when stippling. I do pratice on scrape plastic but just to check out a pattern. I will start stippling and then if I want to do any changes, this method of removal brings you right back to start.
The only thin spots in the Feedom Wlf I have found is in the center area of the front part of the grip where the magazine release spring is located. DO NOT REMOVE PLASTIC BEYOND THE TEXTURE CUT.

I also used the tape trick to straighten out some lines in the index cut. If you have a steady hand and have a good visible line to go by it Is not hard to free hand cut lines.
This is all for now, I have to clean up lines with Jewlers files and then move on to sanding before paint. All this before I get back to stippling the final part of this build.