
Well, it rained this morning, so it is time to start my summer project and thought I would share the process I use and the steps I take along with some of the tools used.
First: When it comes to hand polishing and blending, the biggest mistake newbies make is the
first question they ask (what steps in order do I use) Hand polishing is an art that takes practice to get the feel you need to go through the process of blending. I call this "the art of the scratch". That is what polishing comes down to knowing the different scratches and how deep they are.
When polishing out scratches, you have to use a finer grit to get out a courser grit scratch. This is done by never going over the same direction. What I am trying to say is if you sand in one direction then go over that in another direction (keep changing directions). This slowly bring the material around the scratch down to the depth of the scratch until it is gone.
SO, to answer the question on steps it is up to you to get the feel for removing scratches (it's not steps it's a process)
One rule I lived by over the years for hand polishing is, all ways start with a finer grit because you can all ways go to a courser grit but if you start out with a course grit and didn't need to you have just crated more scratches to remove. Follow this rule and you will soon find yourself learning how deep scratches are and where you need to start in polishing the out. (The Art of the scratch)
Here is my summer project:

This one has been kicking around for years, fist built for my wife as a way to keep building
Mostly use for trying out different polishing and painting techniques.

This is the same pistol I worked on in the trigger post. I like to build up a pistol getting all the inter parts all working, then run some rounds through them with stock parts so I know it is a shooting pistol from the start.
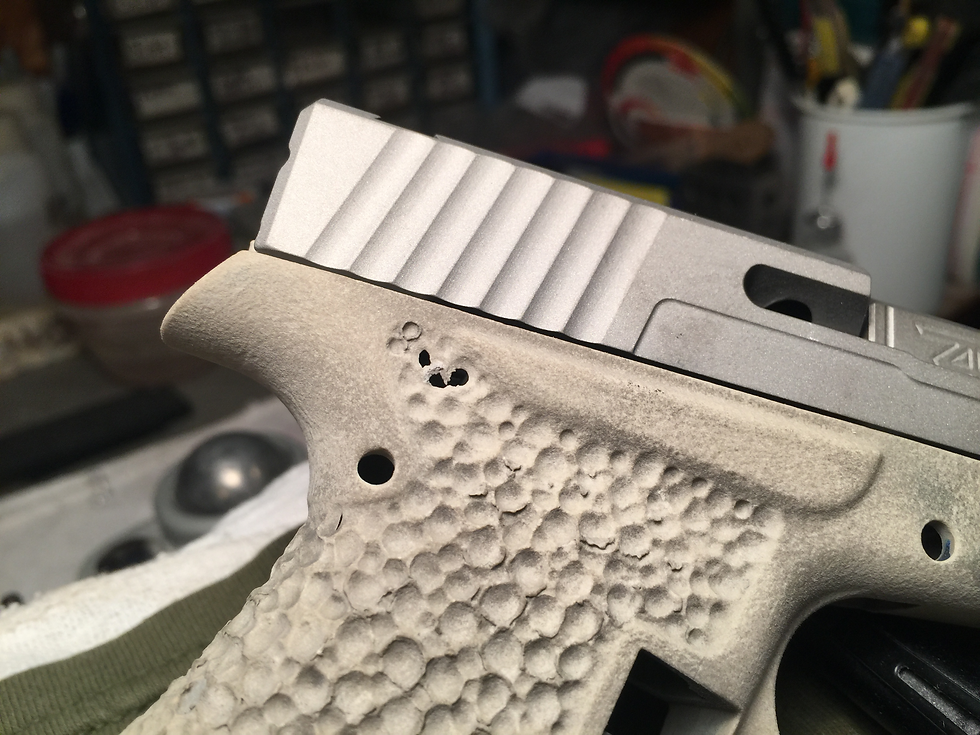
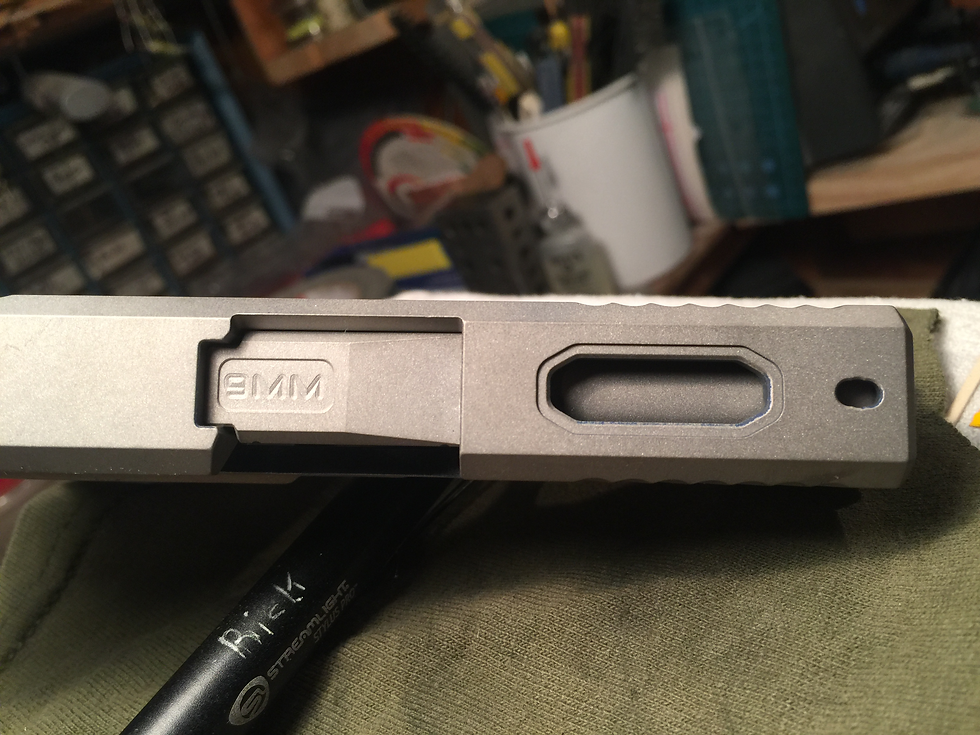
As you can see I have some repair work to do. This is my second attempt at stippling, I should have practiced more but no big deal this can be fixed. I'll go through the step I use to fix this but first I need to clean up the sand blasting first. You can see how blasting didn't get all the paint off. Just a guess on my part but this pistol had at least four coats of paint. I didn't want to over blast it because using a course blasting sand would just make more polishing work in the long run, so I'll sand the rest off.
When I start a build, I try to have a plan or theme at the start. I've been thinking about a Black Widow build for about a year now, this could be the one that gets the Black Widow theme.
Here's my plan:
The pistol is going to be a flat black with a spider web draping down from the center of the slide cut.
In the center of the slide cut on the barrel I want to put a spider etched in the barrel. The look I am going for is a spider in the center of the web. I'm not sure on the web color yet. Not sure if the web should be the same color as the grip or not. The stippling has to be painted because for the hole fixing with JB Weld.
JB Weld doesn't stipple (believe me I tried)
I would like to use a clear pearl coat for the finish but I will need to test the pearl, I never tried pearl clear coat yet.
Will see how it all folds out.
BUT first I have some sanding to do.
I'll post more as I go and hope this helps those that want to build that one-of-a-kind build some helpful info.
by Hawkeye » Sun Jun 19, 2022 12:11 pm
I was up last night watching the planets and thought about how to I can use a straight edge to lay out straight lines. I think I will give that a try next. With the pattern I am looking for I think it has to be straight without being crowded. I'll figure it out if I think about it long enough.